

Table of contents
LAMP (Linux, Apache, MySQL and PHP) Implentation
Prerequisites
Cloud Service Provider - AWS, Azure, GCP, etc.
Launch a Linux Instance (Ubuntu preferably).
Prior knowledge of how to SSH into remote servers.
STEP 1 - INSTALLING APACHE WEB SERVER
Install Apache using Ubuntu’s package managerapt
Update a list of packages in package manager
sudo apt update
Run apache2 package installation
sudo apt install apache2
To verify that apache2 is running as a Service in your OS, use following command
sudo systemctl status apache2
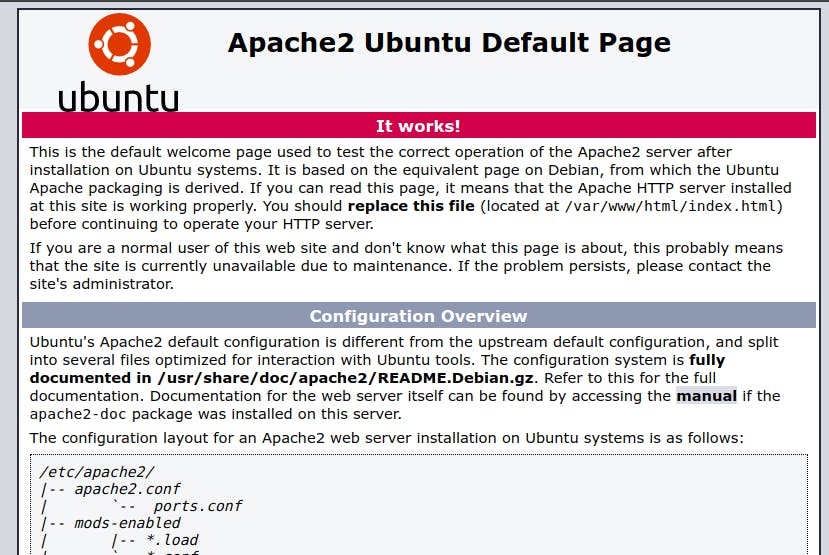
To view the Apache default page, Go to http://Public-IP-Address:80 in your browser
STEP 2 — INSTALLING MYSQL
Again, use apt to acquire and install this software:
sudo apt install mysql-server
When prompted, confirm installation by typing Y, and then ENTER.
When the installation is finished, log in to the MySQL console by typing:
sudo mysql
This will connect to the MySQL server as the administrative database user root, which is inferred by the use of sudo when running this command.
Define the users password using this command
ALTER USER 'root'@'localhost' IDENTIFIED WITH mysql_native_password BY 'PassWord';
Exit the MySQL shell with:
mysql> exit
Start the interactive script by running:
sudo mysql_secure_installation
This will ask if you want to configure the VALIDATE PASSWORD PLUGIN.
STEP 3 — INSTALLING PHP
In addition to the php package, you’ll need php-mysql, a PHP module that allows PHP to communicate with MySQL-based databases. You’ll also need libapache2-mod-php to enable Apache to handle PHP files. Core PHP packages will automatically be installed as dependencies.
To install these 3 packages at once, run:
sudo apt install php libapache2-mod-php php-mysql
STEP 4 — CREATING A VIRTUAL HOST FOR YOUR WEBSITE USING APACHE
Create the directory for 'newproject' using mkdir command as follows:
sudo mkdir /var/www/newproject
Next, assign ownership of the directory to your current system user:
sudo chown -R $USER:$USER /var/www/newproject
Create and open a new configuration file in Apache’s sites-available directory using:
sudo nano /etc/apache2/sites-available/newproject.conf
Paste in the following bare-bones configuration:
<VirtualHost *:80>
ServerName newproject
ServerAlias www.newproject
ServerAdmin webmaster@localhost
DocumentRoot /var/www/newproject
ErrorLog ${APACHE_LOG_DIR}/error.log
CustomLog ${APACHE_LOG_DIR}/access.log combined
</VirtualHost>
Use a2ensite command to enable the new virtual host:
sudo a2ensite newproject
To disable Apache’s default website use a2dissite command, type:
sudo a2dissite 000-default
To make sure your configuration file doesn’t contain syntax errors, run:
sudo apache2ctl configtest
Reload Apache so these changes take effect:
sudo systemctl reload apache2
STEP 5 — ENABLE PHP ON THE WEBSITE
With the default Directory Index settings on Apache, a file named index.html will always take precedence over an index.php file.
In case you want to change this behavior, you’ll need to edit the /etc/apache2/mods-enabled/dir.conf file and change the order in which the index.php file is listed within the DirectoryIndex directive:
sudo nano /etc/apache2/mods-enabled/dir.conf
<IfModule mod_dir.c>
#Change this:
#DirectoryIndex index.html index.cgi index.pl index.php index.xhtml index.htm
#To this:
DirectoryIndex index.php index.html index.cgi index.pl index.xhtml index.htm
</IfModule>
Save and close the file, reload Apache so the changes take effect:
sudo systemctl reload apache2
To verify if this works,
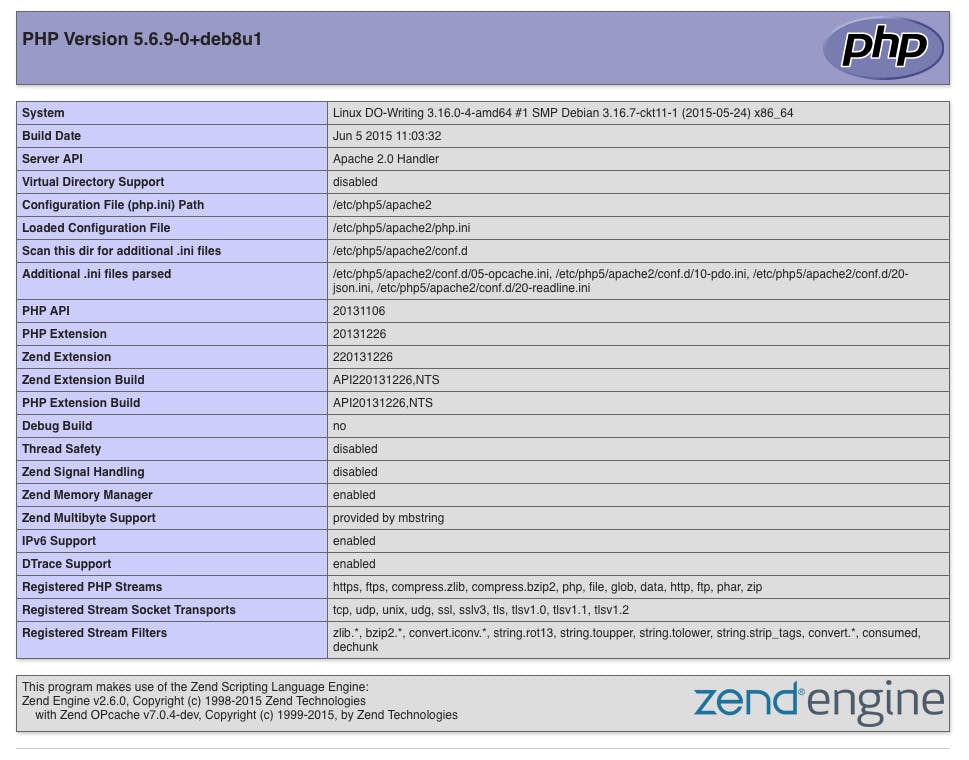
Create a PHP script to test that PHP is correctly installed and configured on your server.
Create a new file named index.php inside your custom web root folder:
nano /var/www/newproject/index.phpThis will open a blank file. Add the following text, which is valid PHP code, inside the file:
<?php
phpinfo();
When you are finished, save and close the file, refresh the page and you will see a page similar to this: